Snakebird Feather Detail: From Digital to Photogravure Print
by Peter Kinchington
What inspired me – I saw a renaissance painting of a feast in preparation showing some of the produce and game that was to be used. I was drawn to the plumage of the “poultry” that was exquisitely painted. And I had in my mind to capture a representation of this when the opportunity presented itself.
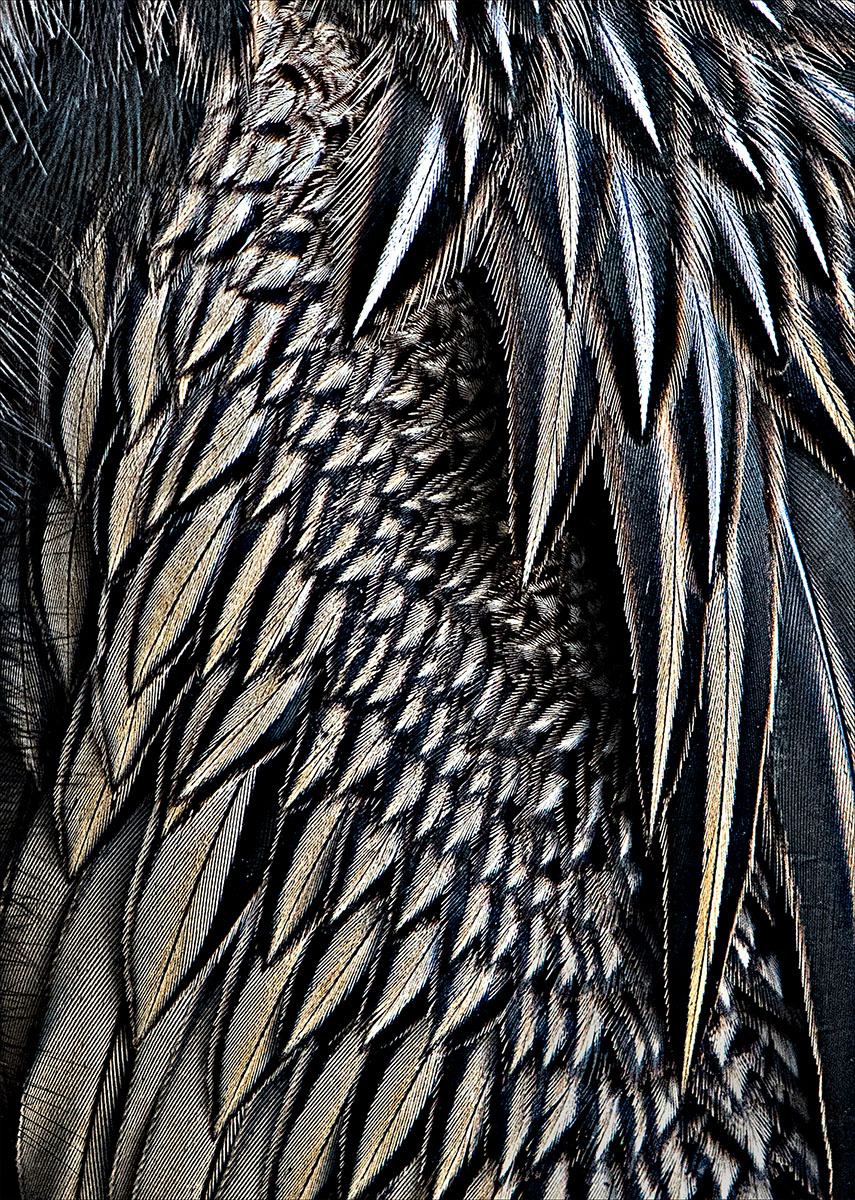 Whilst photographing birds at Lillydale Lake, I noticed a Snakebird/Darter (Anhinga novaehollandiae) that was drying itself on the bank. Unlike many other waterbirds the snakebird does not have waterproof feathers this enables it to easily dive and use its paddle like feet to swim underwater and spear fish with its dart like beak. I carefully approached the snakebird as it was drying and using my Nikon D500 and telephoto lens I then isolated a feather pattern that was reminiscent of the plumage from the painting.
Photogravure – Danielle Edwards arranged through IPT Australia (Institute of Photographic Technology) a workshop for members at the Baldessin Press Studio with Silvi Glattauer. Photogravure is a venerable technique for printing photographs that was originally developed by Joseph Nicéphore Niépce in the 1820s. The technique that Silvi taught used photosensitive polymer plates rather than the usual etched copper plates. The polymer plate was exposed to UV light after having a positive black and white image printed directly onto it. Silvi walked us through the process for creating a suitable digital positive from our chosen image in Photoshop.
A brief outline of the steps involved:
- Convert the captured image to a black and white positive using a suitable profile in photoshop and print this directly to the polymer plate.
- Expose the printed photosensitive polymer plate using UV light.
- Wash the exposed plate in water to etch the plate (exposed areas are hardened and remain raised, unexposed areas are soft and wash away). Dry and trim the plate.
- Coat the plate with ink. Remove excess ink with a light buff using an absorbent rag. Raised (exposed) areas will retain little ink. Unexposed areas will have a lower relief and retain more ink.
- The inked plate is then placed on paper of your choice (Japanese handmade papers are exceptional) and then passed through a hand cranked press.
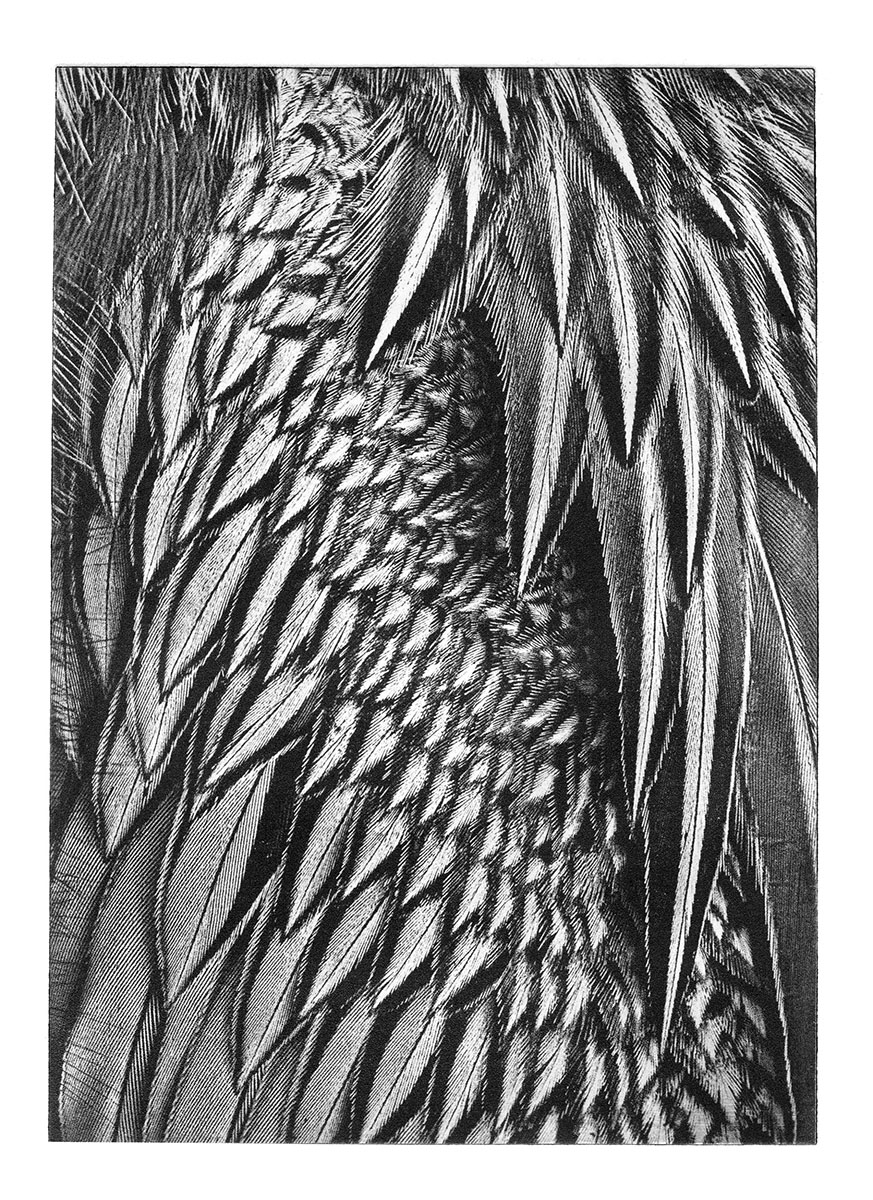
The resulting photogravure print